The Jewel Store Job & Set Up
● GOLD MEDAL ●
Various
Objectives
See
Below
|
In need of money to pay Madrazo, Michael takes down a Rockford Hills Jewel Store with Franklin and a crew.
Rewards: Lots and lots of money
Protagonists: Michael (set up, job), Franklin (job only)
Casing the Jewel Store
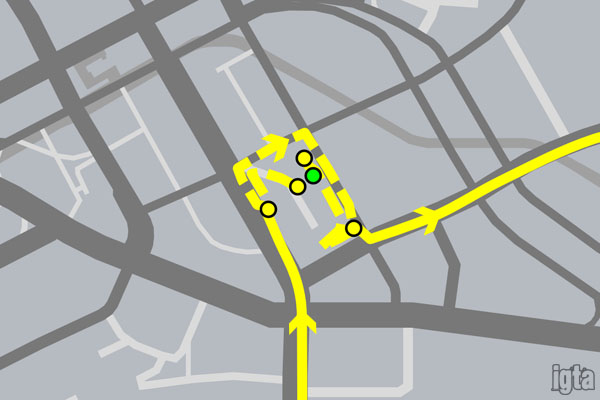
Before you can begin this mission you'll need a suit or something high class. Michael finds Lester in an old garment factory building along the Los Santos River. The job Lester has in mind is the Union Depository - a highly secure facility. Michael informs Lester he just needs enough to pay back Martin Madrazo after wrecking his girlfriend's house. They decide to hit up a jewelry store. Lester knows of Vangelico in Rockford Hills.
Michael says they'll need a crew and proposes recruiting some of the
old guys. Lester informs him that there are no old guys anymore. He lists some people and groups that fizzled out including
an Eastern European guy making moves in Liberty City. Lester will round up some qualified people. Hop in the car with Lester and drive to
Rockford Hills.
Lester asks if Michael's FIB buddies know he is getting back into the business. Michael tries to resist the inquiry but Lester knows quite a lot about Michael's situation and the funds being transferred to FIB Agent Dave Norton - whose track record includes the shooting of Michael Townley. They'll talk more later. Lester gives Michael special glasses with a camera and radio relay. Lester will wait in the car while Michael scouts the store.
Criminally priced goods
Park in the marker and walk to the
jewelers. Controls for the glasses are displayed. When you enter the street Lester will tell you to get pictures of the security features and ventilation systems. Enter the store and look around. Cameras are mounted in each corner along with vents. The alarm panel is to the left next to a door. Take pictures of them.
Next you need to speak with the
shop assistant. Walk over to the counter and a cutscene will show Michael ask about their products. After some discussion about pricing Michael heads out. Go back to your
car. Lester wants to get some shots of the roof ventilation so you'll need to find access. Drive around the block to find a construction site. Walk and climb up to the
roof top. While making your way up, Michael asks about the old crew - especially a certain unnamed member. Lester isn't sure what happened to that person aside from knocking over liquor stores.
When you get to the roof go to the north end and climb up on the tallest building portion to the
vantage point to get a shot of the
vent. Your target to photograph is the fenced in ventilation equipment you'll pass on the way over. After getting the shot return to Lester in the
car. Drive back to the
garment factory. The two discuss their intel and Michael also mentions that he wants to bring in a kid - Franklin - to the crew.
Decisions, decisions
Back at the factory Lester sets up a corkboard with images and other information. It's time to decide which approach to use:
Smart or
Loud and Dumb. Smart will use knock out gas through the ventilation system. Pest control will be their cover. Dumb will utilize weapons and Michael's people skills. For both options a hacker will mess with the alarm system to buy time. The exit plan will use motorcycles running through a new subway tunnel that goes over to the river.
Make your decision and crew member options will be displayed. Pick a driver, shooter, and hacker. Among the hacker options is Rickie Lukens from Lifeinvader.
- Driver: Eddie Toh (14%), Karim Denz (8%)
- Gunman: Gustavo Mota (14%), Norm Richards (7%), *** Packie McReary (12%) If saved during random event
- Hacker: Paige Harris (15%), Christian Feltz (10%), Rickie Lukens (4%)
After picking your options either confirm them or go back to make changes. After confirming Lester says he will locate the necessary equipment and notify the crew members. He'll call Michael when he is ready.
Tips
- As soon as you enter the store, enter the glasses and take a picture to the left where the alarm panel, a camera, and a vent are located. Then walk over to the counter to chat with the assistant.
- Optimal crew is: Eddie Toh, Gustavo Mota (or Packie if available), and Rickie Lukens. Karim will provide the wrong motorcycles and not know his way through the tunnels. Norm will cause an employee to take a stand against the raid (loud approach) and later he'll crash his motorcycle just before entering the tunnels. Rickie provides the least amount of time but you should be able to grab everything.
Objectives
- Mission Time - Complete within 08:00.
- Picture Perfect - Capture all 3 security features in one picture.
Loud Approach
The choice is made to go in with guns blazing.
Carbine Rifles
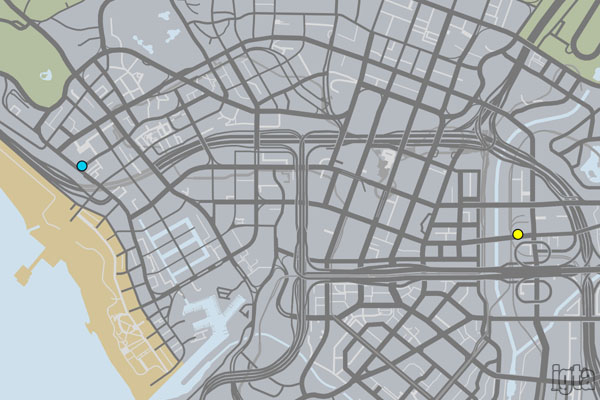
The LSPD has a SWAT truck near the beaches. Go to the area and find the
LSPD tactical team truck roaming the streets with lights and sirens. They won't stop for other vehicles so you'll need to get their attention. Ram them or just start shooting. Take out the team however you can and grab the truck. Lose your wanted level and drive it back to the
garment factory.
Tips
- Since the police have good weapons, use your vehicle as cover after the first few shots are fired. Best approach I found was to stay a distance away and shoot the occupants in the vehicle.
Objectives
- Swift Getaway - Lose the wanted level within 02:00.
The Jewel Store Job
With the preparation done it's time to do the dirty. Michael and Lester brief the team. If any of them get caught by the law, they are on their own and don't know anybody else. This meeting never took place. The crew will go hard on staff members but easier on customers. Franklin will drive the getaway vehicle. With no questions they move out.
You are SWITCHed to Franklin. Go outside and jump into the
van with Michael and the rest of the entry team. Drive to the
jewelry store. During the trip Michael wants to foster trust between the team so they all introduce themselves with some background of who they are. Pull up into the marker and a cutscene will show the van back up the street to the store. Michael and the two gunners enter the store yelling and waving their guns.
SWITCHed to Michael, start smashing display cases to get the jewelry. The other two team members will do the same. When all of the cases are cleaned out or you run out of time, head outside. Franklin will be waiting with the motorcycles as a cop tells him to move. Michael throws the officer down and tells him to forget what he saw. He hands his bag to Franklin and tells him to go.
***Skip down for escape route***
Smart Approach
The choice is made to use guns as little as possible.
Bugstars Equipment
Go to the Bugstars warehouse in the Port of Los Santos. There are three
vans to take as well as personnel around them. Use either stealth or force to take a van. The second will get you a wanted level. Drop off the van next to the
garment factory to complete this mission.
Tips
- Go around the back (water side) and park a short distance from the garage door. Enter stealth and walk up to the guy at the back of a van to perform a stealth kill with your fists. Then quietly enter the van and back out the way you came in.
Objectives
- Sneaky Pest - Steal the Bugstars van without being detected.
BZ Gas Grenades
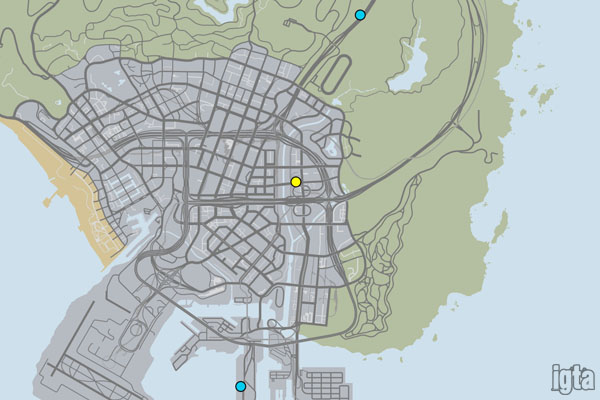
A truck carrying the knockout gas grenades is making its way into the city from the north. Go meet the
Humane van on the highway and steal it or its
cargo by shooting open the rear doors so they fall out. Either method will get you a wanted level. However you acquire the gas get it back to the
garment factory. Park the van under the bridge or take the case upstairs into a back room.
Tips
- Shoot the back doors open on the van for an easier escape from the law. When the doors fly open a few cases will drop out so grab them. A good idea is to steal another escape vehicle while you have traffic stopped so the cops won't notice you.
Objectives
- Loose Cargo - Shoot open the back doors to release the cargo.
The Jewel Store Job
With the preparation done it's time to do the dirty. Michael and Lester brief the team. They shouldn't have an issue given the approach but if you-know-what hits the fan then they will go out shooting. With no questions they move out. The team splits up into different vehicles with Michael and Franklin in a
car. Get in and drive to the
jewelry store.
During the ride Michael tells Franklin that he needs to prove himself to the rest of the crew. Franklin asks if Michael is nervous and Michael will go over his thoughts about the crew he picked. Drop Franklin off at the construction site so he can throw the gas into the vent system. You are now SWITCHed to Franklin. Go to the
roof and make your way to the high northern structure again where Michael took the picture of the vents. Equip your BZ gas canisters and toss one at the
air vent.
The gas will make its way through the vents and do its job to knock out the people. Michael and the entry team will go into the store. SWITCHed back to Michael, start smashing cases to get the jewelry. Your team will assist you. When all of the cases are cleaned out or you run out of time, head outside. Franklin will be waiting with the motorcycles as a cop tells him to move. Michael throws the officer down and tells him to forget what he saw. He hands his bag to Franklin and tells him to go.
The getaway
SWITCHed back to Franklin, drive off with the rest of the
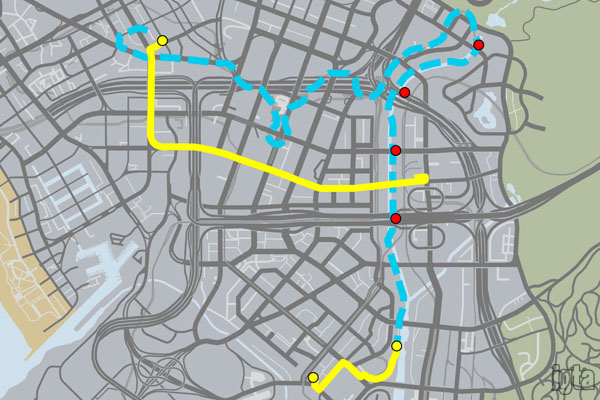
crew as you are given a 4 star wanted level. Follow the crew through the streets and into the tunnels under construction. Use Franklin's Special Ability if needed to navigate the tight turns and obstacles. After winding through tunnels that never seem to end you'll get over to the LS River. Unfortunately the plan hasn't completely worked and the cops are waiting with the getaway truck.
When you exit into the river you will be SWITCHed to Michael again who is driving the truck. You need to take out the
cops before getting to the
rendezvous point. Ram the cop cars so they crash or give up. Cross over the river (it's shallow) and get the cops behind the bike team as well. When you reach the marker stop the truck and the bikes will drive into the back. Drive to Lester's
lockup and park in the marker. Michael tells the crew to split up. Lester will wire the money later when the sales are made. Michael tells Franklin to stop by his house later to celebrate.
A while later Franklin is found at a strip club talking to Tanisha on the phone. He wants to get together but she figures out where he is and tells him to grow up. So much for that. You are left in control of Franklin.
Tips
- There is no vehicle damage objective so don't worry about banging up any of the vehicles involved.
- Start with the closest display case and work your way around the store. Tap the button as you walk up to break in as soon as possible.
- If you lose a crew member, be sure to grab their portion of the score and continue on. You might "lose the crew", though, which is a failure and you'll need to restart from a checkpoint.
Objectives
- Quick Grab - Steal the jewelry within 50 seconds.
- Protégé Protected - Protect Franklin during the LS River chase
- Clean Sweep - Steal the jewelry from all 20 glass cabinets.
 © iGrandTheftAuto & Simon 'Psy' Elliott 2008-2024. Powered by iGrandTheftAuto CMS. Privacy Policy


