Map, screenshot and text locations of all 100 hidden packages scattered throughout GTA Liberty City Stories.
GTA Liberty City Stories includes 100 hidden packages to find and collect. For every 10 packages you collect you'll unlock a new weapon at your safehouses meaning free ammo, so they're definitely worth hunting down as soon as possible.
Collecting Packages
Simply walk over a package to collect it. You'll know when you see one as they're floating in the air with a glowing white light around them. In GTA Liberty City Stories, the hidden packages are shaped like hands doing the rock 'devil horns' sign.
Package Collection Rewards
Each package you collect will award $250 and after every 10 packages collected, a new weapon or item will unlock and permanently spawn at every safehouse.
| Packages
|
Reward
|
| 10
|
Pistol
|
| 20
|
Shotgun
|
| 30
|
Body Armor
|
| 40
|
SMG
|
| 50
|
.357
|
| 60
|
M4
|
| 70
|
Laser Sighted Sniper Rifle
|
| 80
|
Flame-Thrower
|
| 90
|
Rocket Launcher
|
| 100
|
$50,000
|
Hidden Packages Map
Click below to view our hidden package locations map. The numbers correspond with the screenshots and info below. Screenshots coming soon!
Portland Hidden Packages
There are 40 hidden packages to collect in Portland.
You can use the
Heavy Bike Exploit to access other islands from the start of the game meaning you can collect at least 96 of the 100 packages at the start of the story.
Hidden Package #1
Found in Harwood, Portland.
Inside the wooden security booth at the North West of the ferry station.
Hidden Package #2
Found in Portland, Portland.
On a rocky island to the North of Portland.
Hidden Package #3
Found in Harwood, Portland.
On the shore next to the water inside a construction area. You can use a bike to jump into the enclosed area from a ramp further down the coastline.
Bike jump or boat required
Hidden Package #4
Found in Harwood, Portland.
Towards the center of the dirt track, directly below the train tracks.
Hidden Package #5
Found in Harwood, Portland.
Right behind the car crusher. You'll need to jump over some pipes to get to it.
Hidden Package #6
Found in Portland Beach, Portland.
At the end of the concrete promenade, hidden in a small groove between the sea wall and the grass, not far from the water.
Hidden Package #7
Found in Saint Mark's, Portland.
On top of the gas station. You'll need to get a bike (there's a Sanchez parked at the gas station) and use a hill to the North to jump from the car crusher area onto the gas station roof to get it.
Hidden Package #8
Found in Saint Mark's, Portland.
Floating inside the destroyed shell of an old car, behind a fence, just to the East of the Capital Autos showroom.
Hidden Package #9
Found in Hepburn Heights, Portland.
Behind two huts in the Projects construction area
Hidden Package #10
Found in Red Light District, Portland.
On a ledge above the Projects main entrance. To get there, you'll need to use a bike and the stunt jump from the ruins of the building destroyed in the Blow Up 'Dolls' mission. Once you jump to the roof of the projects, you can drop down to the lower ledge to find the package.
More easily accessible after Blow Up 'Dolls'.
Hints & Tips
It's possible to get this package before completing Blow Up 'Dolls', however you'll need to use a fast bike and speed along the train tracks from Hepburn Heights, then as the tracks curve, try to jump off the side and clear the gap onto the construction building. It will likely take a few attempts but it's definitely possible.
Hidden Package #11
Found in Red Light District, Portland.
In the corner of an alleyway (which happens to be the Portland Safehouse from GTA 3) behind two dumpsters which you'll need to jump over.
Hidden Package #12
Found in Red Light District, Portland.
Inside the ruins of the dolls house behind a small wall to the West side of the building. It's almost impossible to miss once you've blown up the building in the story mission, but until then it's trapped behind a solid wall.
Only accessible after Blow Up 'Dolls'.
Hidden Package #13
Found in Saint Mark's, Portland.
Right outside Toni's Portland safehouse, on a ledge, next to some vents. You'll need to use an Ambulance or another tall vehicle you can jump on top of in order to reach it.
Hidden Package #14
Found in Saint Mark's, Portland.
In a fairly well hidden alleyway in the center of Saint Mark's. You'll need to head up and around a ledge then down a ramp to the back to find it near the wall.
Hidden Package #15
Found in Portland Beach, Portland.
Directly behind Salvatore's mansion is a sloped cliff which looks out towards the lighthouse. Carefully walk down the cliff face and you'll find the package at the bottom.
Hidden Package #16
Found in Portland Beach, Portland.
This one is at the base of the actual lighthouse. You'll need to park a boat at the jetty then jump onto the wooden stairs and head up halfway until you spot it in a groove under the lighthouse.
Hidden Package #17
Found in Saint Mark's, Portland.
East of the dirt road when entering Salvatore's Gentlemans Club area. The package can be found slightly down the rocky cliff face overlooking the beach, almost in line with the lighthouse.
Hidden Package #18
Found in Saint Mark's, Portland.
In the alleyway directly behind Ammu-Nation, just behind a small wall.
Hidden Package #19
Found in Saint Mark's, Portland.
Next to some dumpsters in a raised area between some buildings, just West of a long alleyway.
Hidden Package #20
Found in Saint Mark's, Portland.
Next to a table with an umbrella on the second floor of Marco's Bistro.
Hidden Package #21
Found in Chinatown, Portland.
On top of the train station. Use a bike and speed up the thin metal stairs which should give you a slight boost jump and allow you to land on the roof.
Hidden Package #22
Found in Portland View, Portland.
In the corner of a small alleyway with garages, just across the road from the hospital, usually partly hidden by a parked Esperanto.
Hidden Package #23
Found in Portland View, Portland.
Right behind the hospital on a ledge. Access it from the grassy hill next to the police station just to the South.
Hidden Package #24
Found in Portland View, Portland.
Between the trees and bushes in the grassy area between the police station and Trenton.
Hidden Package #25
Found in Portland View, Portland.
Right under the train station, opposite Marco's Bistro. Run slightly down the grassy hill and follow it around to find it tucked away in the corner, under the train tracks.
Hidden Package #26
Found in Portland Harbor, Portland.
On the roof of the Eastern-most warehouse at the harbor. Use a motorbike and hit the ramp to the West then carefully drive your way across the other warehouses to reach it.
Hidden Package #27
Found in Portland Harbor, Portland.
On top of a stack of shipping containers. You'll need to jump on a reasonably tall vehicle to climb up. The Linerunner parked at the South West of the docks works ok, it's just a bit hard to jump on top. Otherwise an Ambulance is your best bet.
Hidden Package #28
Found in Portland Harbor, Portland.
Make your way up the stairs and onto the roof of the large Southern-most warehouse at the harbor. The package is at the South-West end of the roof, hidden next to a vent.
Hidden Package #29
Found in Portland Harbor, Portland.
On the upper floor of the ship docked at the harbor. You might need to use a bike to jump across the small gap to get onto the boat. Head to the East end of it where you'll find a sloped walkway to make your way to the second floor. There's a large ramp at the end of the boat you can use to get back to land.
Hidden Package #30
Found in Chinatown, Portland.
In the center of a triple-entrance alleyway behind Mr Wong's Laundrette.
Hidden Package #31
Found in Trenton, Portland.
On the roof of Don Kiddick's Sausage Factory. You'll need to jump to the roof from the train tracks where you'll find the package between two signs and a chimney on a raised section of the roof.
Hidden Package #32
Found in Trenton, Portland.
On the roof of a warehouse to the South-West of Trenton. You'll can either use a tall vehicle like an Ambulance to jump on top of the small hut, or use a bike and use the wooden ramp at the back of the building to jump onto the rooftop where you'll find a flamethrower, then jump across to where the package is.
Bike jump or tall vehicle required
Hidden Package #33
Found in Trenton, Portland.
Next to the door of a small office at the North-East end of the bus terminal.
Hidden Package #34
Found in Chinatown, Portland.
In the planter of a parking lot next to the Old School Hall, partially covered by a bush.
Hidden Package #35
Found in Atlantic Quays, Portland.
At the end of a long, bumpy wooden jetty at the South of Portland.
Hidden Package #36
Found in Atlantic Quays, Portland.
Between two dumpsters at the West end of the warehouses in Atlantic Quays.
Hidden Package #37
Found in Portland Harbor, Portland.
Between two trailers at the South-East end of the harbor.
Hidden Package #38
Found in Callahan Bridge, Portland.
On a supporting beam between both sides of the roads heading up the bridge. You'll need to jump onto the concrete wall at the side of the road then drop down onto it.
Hidden Package #39
Found in Callahan Bridge, Portland.
On a metal walkway under the bridge. You'll need to use a bike and hit the concrete ramp nearby heading from North to South to land on the walkway where you'll find the package. This one's a bit tricky to pull off as you need a lot of speed to travel far enough, but unless you aim the jump perfectly, you'll struggle to stay on the metal walkway. Keep trying and you'll get it in the end!
Hidden Package #40
Found in Red Light District, Portland.
Hidden in some bushes on one of the larger planters in the middle of the road, pretty much directly under the train tracks.
Staunton Island Hidden Packages
There are 30 hidden packages to collect on Staunton Island.
You can use the
Heavy Bike Exploit to access other islands from the start of the game meaning you can collect at least 96 of the 100 packages at the start of the story.
Hidden Package #41
Found in Rockford, Staunton Island.
Next to a portacabin in the car park at the ferry terminal.
Hidden Package #42
Found in Aspatria, Staunton Island.
Right next to a ramp which is used for a stunt jump near the trees and foliage, just North of the stadium.
Hidden Package #43
Found in Rockford, Staunton Island.
Behind the hospital is an under-construction tunnel. The package is found just inside the freshly started boring hole.
Hidden Package #44
Found in Rockford, Staunton Island.
Amongst some plants at the East end of the hospital car park.
Hidden Package #45
Found in Rockford, Staunton Island.
Behind a grey wall near the entrance road to the hospital car park.
Hidden Package #46
Found in Rockford, Staunton Island.
On some stony ground next to the grass, just East of the road.
Hidden Package #47
Found in Fort Staunton, Staunton Island.
Head down the stairs into Rockford subway station (across the road from the front of the hospital) and you'll find the package in the corner after turning left.
Hidden Package #48
Found in Fort Staunton, Staunton Island.
Hidden behind a dumpster in the corner of an alleyway.
Hidden Package #49
Found in Fort Staunton, Staunton Island.
On a small rocky island between Staunton and Portland. The island itself doesn't show on the map.
Hidden Package #50
Found in Fort Staunton, Staunton Island.
Carefully walk down next to one of the North-West pillars at the end of the bridge.
Hidden Package #51
Found in Fort Staunton, Staunton Island.
Behind the sign for "Botiglia" on a small walkway. You can walk up the small concrete ramp nearby and jump over to the awning to grab the package.
Hidden Package #52
Found in Fort Staunton, Staunton Island.
On the second floor of a destroyed building. Make your way up the makeshift ramp and work your way around the rubble until you find it above the road. This will likely be the last package you acquire because it's only available right near the end of the story.
Only accessible after 'Bringing the House Down'
Hidden Package #53
Found in Fort Staunton, Staunton Island.
On the Eastern side of the roof of the Staunton Cafe. You'll need to use a tall vehicle like an Ambulance to jump up. If you wait on the road nearby, a Linerunner or similar truck will drive by which you can use to get up.
Hidden Package #54
Found in Aspatria, Staunton Island.
Next to a tree in the parking lot just South of the football stadium.
Hidden Package #55
Found in Aspatria, Staunton Island.
Just off the footpath, looking out over the water next to a large concrete ramp.
Hidden Package #56
Found in Newport, Staunton Island.
Between two dumpsters next to 8-Ball's bomb shop.
Hidden Package #57
Found in Newport, Staunton Island.
At the base of a pillar holding up the expressway. Found overlooking the water on the grass near Asuka's condo.
Hidden Package #58
Found in Belleville Park, Staunton Island.
On a ledge just South of the bridge entrance to Shoreside Vale. After following the rounded road to the top, you can run and jump diagonally to land on the ledge where the package is. You can also hit the side of the ramp on a bike to land there but it's easier to aim the jump on foot, albeit with a bit of health loss as you make your way back down.
Hidden Package #59
Found in Belleville Park, Staunton Island.
In the center of the park, up some stairs and around the back of the large monument.
Hidden Package #60
Found in Newport, Staunton Island.
On a glass awning above the entrance to Lips 106 headquarters. A stubby shotgun spawns in the doorway just below it. There's a grassy mount you can run and jump from slightly to the West to get up to the concrete rooftop.
Hidden Package #61
Found in Newport, Staunton Island.
Head onto the raised section between the roads of the expressway but stop before going over the end of the grassy ramp. Walk along the top of the wall around the outside and make your way carefully to the package perched on the end. Walk slowly and use the manual look feature to make it easier to stay on the wall.
Hidden Package #62
Found in Newport, Staunton Island.
Found between a concrete ramp and a red shipping container, slightly North of the Callahan Bridge near Asuka's condo.
Hidden Package #63
Found in Callahan Bridge, Staunton Island.
You'll find the package on the other side of a small ramp on the Callahan Bridge, heading from Staunton Island back to Portland. Attempting to collect the package before unlocking Staunton Island will cause it to float in the air making it hard but not impossible to get, but you're best off just waiting until the bridge is "open" after Driving Mr Leone.
Only accessible after 'Driving Mr Leone'
Hidden Package #64
Found in Belleville Park, Staunton Island.
After crossing the Callahan Bridge heading West, the package will be almost completely hidden by foliage in the first planter you come to in the middle of the road.
Hidden Package #65
Found in Bedford Point, Staunton Island.
On the grass next to some bushes inside the South-Western end of the cemetery.
Hidden Package #66
Found in Torrington, Staunton Island.
Head into the Fully Cocked Gun Shop, marked by an American flag on the map and go upstairs behind the shopkeeper. Once there, jump over the small wall alongside the crates and walk around near the windows where you'll find the package.
Hidden Package #67
Found in Torrington, Staunton Island.
On some grass next to a tree in the middle of the road. Drive up either end of the raised section to reach it.
Hidden Package #68
Found in Torrington, Staunton Island.
Next to a searchlight on the West side of the Casino.
Hidden Package #69
Found in Torrington, Staunton Island.
Hidden in the fire exit doorway in a small alleyway between two buildings at the South of Staunton Island.
Hidden Package #70
Found in Bedford Point, Staunton Island.
At the top of the steps of the Bedford Point Courthouse, in front of the main door, just behind the pillars.
Shoreside Vale Hidden Packages
There are 30 hidden packages to collect in Shoreside Vale.
You can use the
Heavy Bike Exploit to access other islands from the start of the game meaning you can collect at least 96 of the 100 packages at the start of the story.
Hidden Package #71
Found in Francis International Airport, Shoreside Vale.
Near the end of the Southern-most runway, next to the water on ground with diagonal yellow lines.
Hidden Package #72
Found in Francis International Airport, Shoreside Vale.
Between two large yellow striped ramps at the West end of a hangar towards the center of the Northern runway.
Hidden Package #73
Found in Francis International Airport, Shoreside Vale.
At the West side of Avery Carrington's hangar, between the outer wall and a steep grassy hill.
Hidden Package #74
Found in Francis International Airport, Shoreside Vale.
On the Southern wing of the most North-Easterly parked plane in front of the hangars. You should be able to jump onto the top of the plane with a bike from the nearby stairs to get to it. You won't need much speed at all, just a tiny jump from the stairs to the wing a few feet away. Alternatively use an Ambulance or another tall vehicle to jump onto the wing.
Bike jump or tall vehicle required
Hidden Package #75
Found in Francis International Airport, Shoreside Vale.
Enter the central airport from a gate near the Fire Department to the North, then follow a series of ramps to jump onto a ledge and then over a wall to find the package. You'll probably want to use a bike for this one.
Hidden Package #76
Found in Francis International Airport, Shoreside Vale.
After entering the central part of the airport near the Fire Department, stick to the Eastern side and speed towards a ramp on a bike, aiming to clear a blocked off area made of shipping containers. Land inside where you'll find the package, including a ramp to get out. Alternatively you could use a tall vehicle to jump onto the containers if you can get one into the central area.
Bike jump or tall vehicle required
Hidden Package #77
Found in Francis International Airport, Shoreside Vale.
Using a bike, hit the staircase at the West side of the central airport building and land on the sloped roof above. The package is hidden behind a sign.
Hidden Package #78
Found in Francis International Airport, Shoreside Vale.
Starting inside the airport, by the Northern runway, you'll find a wooden ramp at the North-East allowing you to jump on top of the airport terminal. Once up there, follow it along where you'll find the package by a sign just above the road.
Hidden Package #79
Found in Francis International Airport, Shoreside Vale.
Under the Shoreside Vale bridge, on grass between the two entrance/exit ramps.
Hidden Package #80
Found in Francis International Airport, Shoreside Vale.
Right behind the Kronos billboard on the corner of the road to the North of the Airport's main entrance.
Hidden Package #81
Found in Pike Creek, Shoreside Vale.
Follow the dirt track towards the broken wooden bridge, then carefully make your way down the side to the stony pathway next to the water. Follow it along the river to the North West and you'll spot the package near a boulder.
Hidden Package #82
Found in Pike Creek, Shoreside Vale.
Next to a dumpster in the corner of an alleyway behind Holy Rev. Joe's Flophouse.
Hidden Package #83
Found in Pike Creek, Shoreside Vale.
Head up the stairs to the roof of the KLUNT warehouse and you'll find a ramp at the North-West end. The package is right behind the ramp, at the West side of the roof.
Hidden Package #84
Found in Pike Creek, Shoreside Vale.
Grab an Ambulance from the hospital then head around to the back of the hospital building and use it to jump over the wall. Land on the large warehouse below and you'll find the package perched on the South-East corner of the rooftop.
Hidden Package #85
Found in Francis International Airport, Shoreside Vale.
South of Pike Creek but North of the Airport are a large area of grassy hills. You'll find the package floating on the grass in the middle of the area, not really near any notable landmarks.
Hidden Package #86
Found in Pike Creek, Shoreside Vale.
Inside the South Eastern garage behind the police station.
Hidden Package #87
Found in Pike Creek, Shoreside Vale.
In some foliage next to the stairs alongside the AmCo Petrolium Company offices. You'll need to jump over the wall at the top of the stairs.
Hidden Package #88
Found in Pike Creek, Shoreside Vale.
Behind some stacks of wood, around the back and lower section of the complex where 8 Ball's bomb shop can be found.
Hidden Package #89
Found in Pike Creek, Shoreside Vale.
Hidden behind some large white storage tanks, next to the wall of the large building at the North West of Pike Creek.
Hidden Package #90
Found in Cochrane Dam, Shoreside Vale.
Right on the edge of the cliff looking out to sea to the West of the entrance to the upper Cochrane Dam.
Hidden Package #91
Found in Cochrane Dam, Shoreside Vale.
Behind a pile of boulders at the South of the ring-road at the lower part of the Cochrane Dam.
Hidden Package #92
Found in Cochrane Dam, Shoreside Vale.
At the lower Cochrane Dam, just North of the road, is a walkway leading around the front of the helipad building. The package is on this metal walkway, next to a door.
Hidden Package #93
Found in Cochrane Dam, Shoreside Vale.
On lower part of the actual dam, behind the first stack of shipping containers you'll see when driving down. You'll need to go a little way past it then double back to gain access.
Hidden Package #94
Found in Cedar Grove, Shoreside Vale.
Inside the Upstate Tunnel, to the West end of the blocked off section which would continue North.
Hidden Package #95
Found in Cedar Grove, Shoreside Vale.
On the East side of a big pink/red house.
Hidden Package #96
Found in Cedar Grove, Shoreside Vale.
Right by the water near the picnic area, looking directly across towards the football stadium.
Hidden Package #97
Found in Cedar Grove, Shoreside Vale.
Half way up the rocky cliff between Cedar Grove and Wichita Gardens. Almost level with the underground train tracks on the in-game map.
Hidden Package #98
Found in Cedar Grove, Shoreside Vale.
Behind the billboards on the S-shaped road between Cedar Grove and Wichita Gardens.
Hidden Package #99
Found in Wichita Gardens, Shoreside Vale.
Inside the West-facing doorway of the most Southern tower in Wichita Gardens.
Hidden Package #100
Found in Wichita Gardens, Shoreside Vale.
Just South from the line of billboards, right by the water on some rocky ground.
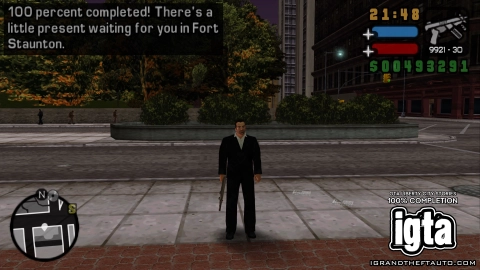
Reward: $50,000
Your reward for collecting all packages is $50,000 in cold, hard cash, to go along with all of the weapons you already unlocked at your hideout.
Each of the hidden packages must be collected as a requirement towards 100% completion.
Check out our interactive checklist, allowing you to tick off each objective on the way to 100% completion in GTA Liberty City Stories!
This guide has been viewed 4,525 times. Thanks for your support!